
There are many reasons to transfer an app between Apple Developer accounts: the app may be sold to a new owner, handed over to another company, moved as part of a change in ownership structure, or simply transferred to another Developer account. Apple provides an official mechanism for this called App Transfer in App Store Connect.
The process has two parts. First, the current account's Account Holder prepares the app and submits the transfer request. Then the recipient account's Account Holder reviews the information, provides the required new details, and accepts the app.
When the transfer is completed correctly, the app does not need to be republished as a new product. It keeps its Bundle ID, remains available on the App Store, preserves its ratings and reviews, and users continue to receive updates. However, before the transfer can begin, both the app and the two Developer accounts must meet Apple's requirements.
Step-by-step walkthrough: youtu.be/ZQF2IhX1X_s
What to Check Before an App Transfer
The most common mistake is going straight to Transfer App without preparing the accounts and the app first. App Store Connect checks a list of requirements, and if even one mandatory criterion is not met, the transfer cannot be submitted.
Before starting, make sure neither the sender nor the recipient account is in the middle of another unresolved account change or operation. Both accounts should have accepted the latest applicable Apple agreements, including the required Paid Apps and Free Apps agreements.
The app must have at least one version that has already been released on the App Store. It also must not be in a state that is incompatible with transfer, such as being in App Review or waiting for release, and it must not be available for pre-order.
Some requirements depend on the app's capabilities. Apple may check In-App Purchases, subscriptions, iCloud, Sign in with Apple, Game Center, Xcode Cloud, Wallet, App Groups, and other features. There is therefore no single short checklist that applies to every project; the final list of criteria should always be reviewed directly on the Transfer App page.
Step 1. Open the App on the Sender Account
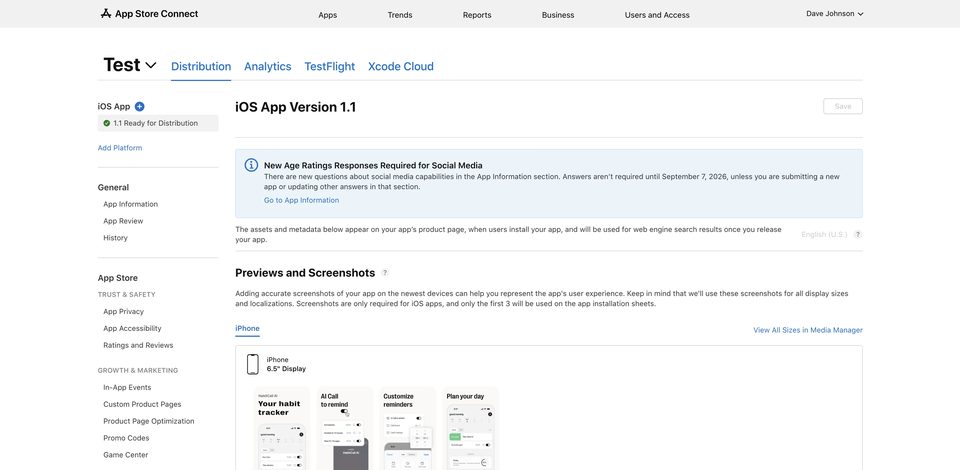
Sign in to App Store Connect with the account that currently owns the app and open the Apps section. Select the app you want to transfer.
Before going further, make sure you have selected the correct app and that its published version is in an appropriate state.
Step 2. Check TestFlight
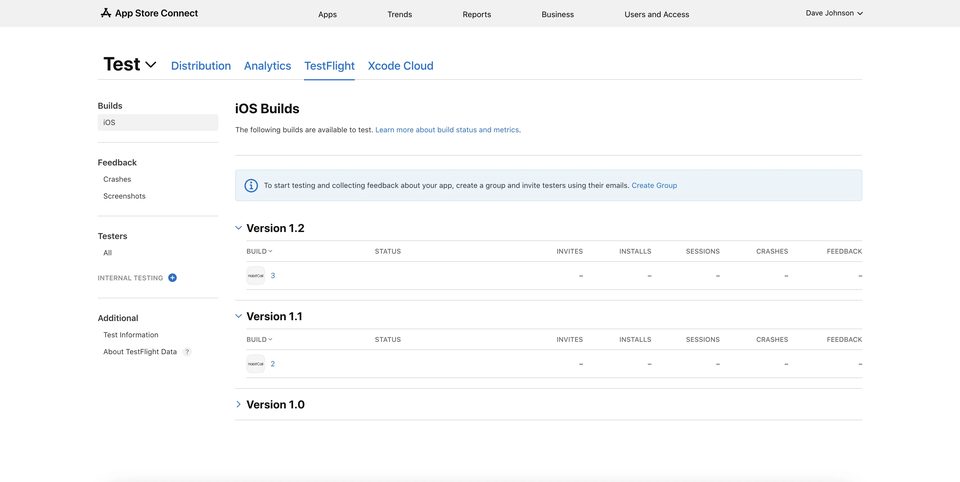
Open the TestFlight tab and review the current beta-testing setup.
For apps using TestFlight, Apple recommends turning off beta testing before the transfer: remove builds and testers and clear the Test Information fields for localizations. The Transfer App interface may also show a separate TestFlight requirement in the eligibility checklist.
If TestFlight is no longer in use and nothing is blocking the transfer, continue to the next step.
Step 3. Open App Information
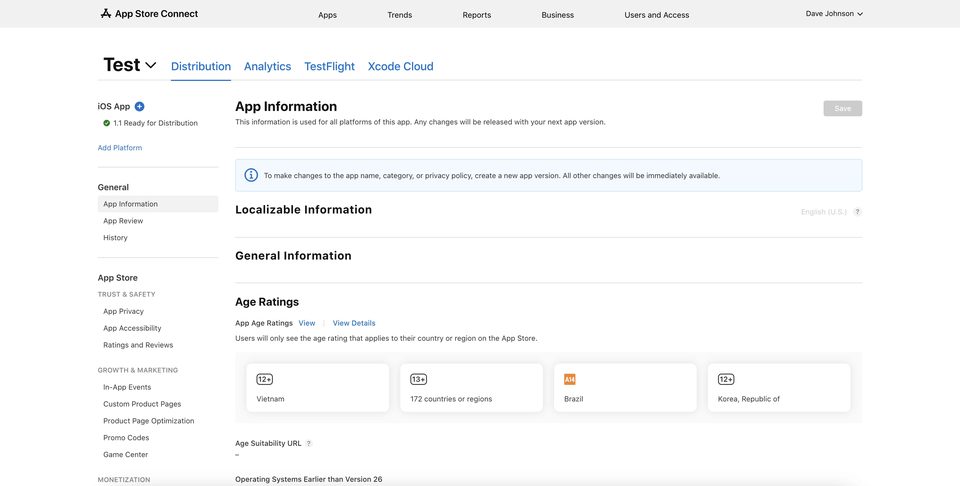
Return to the Distribution tab and open App Information from the left-hand menu.
This is where App Transfer is managed. It is also a useful place to review some of the information the recipient may need after the transfer request is submitted.
Scroll down to Additional Information and click Transfer App.
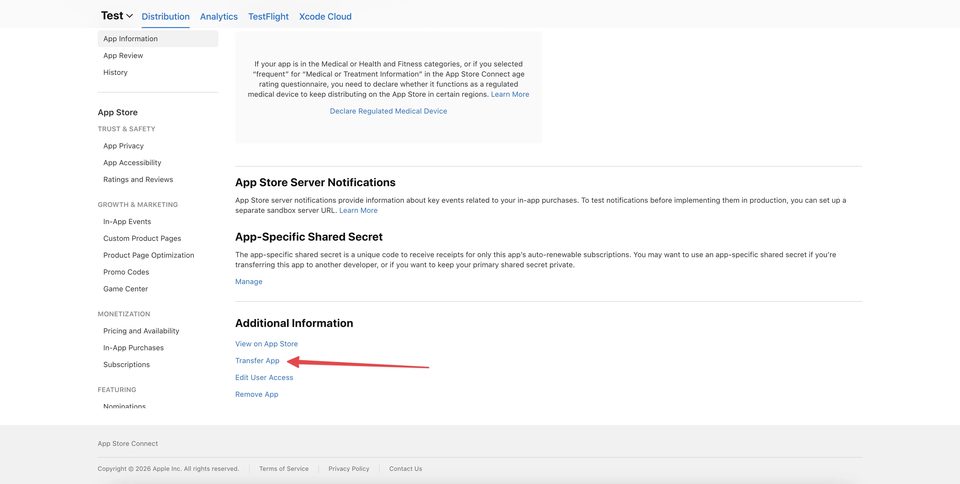
Step 4. Review Apple's Transfer Criteria
After you click Transfer App, App Store Connect opens a page listing the transfer requirements. It automatically checks the app and shows which criteria have been met.
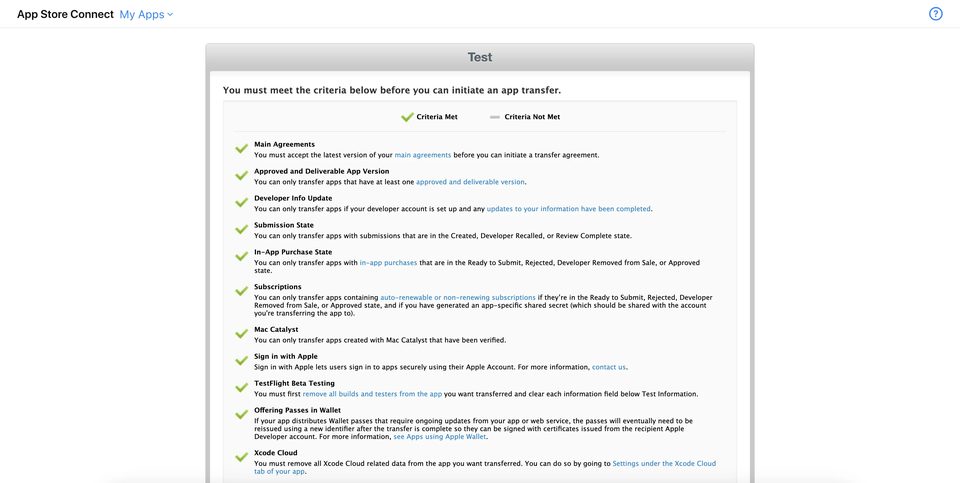
Do not treat this screen as a formality. If any requirement is not marked as completed, investigate the reason first. App Store Connect will usually tell you what needs to be corrected.
The checks may include:
- current Apple agreements;
- the presence of a released app version;
- an eligible submission state;
- the status of In-App Purchases and subscriptions;
- TestFlight;
- Xcode Cloud;
- Sign in with Apple;
- iCloud and CloudKit;
- no unpaid invoices to Apple;
- additional regional or technical requirements.
Some capabilities require preparation outside App Store Connect as well. For example, apps with auto-renewable subscriptions should prepare and share the app-specific shared secret with the recipient before the transfer. Apps using Sign in with Apple, push notifications, keychain sharing, or iCloud may also require specific steps before and after the transfer.
If all criteria are met, click Continue.
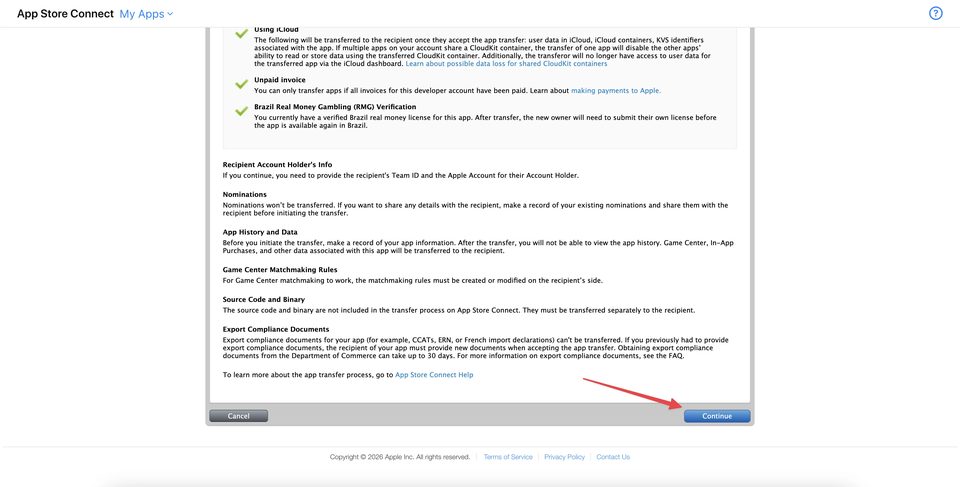
Step 5. Enter the Recipient's Information
On the next screen, Apple asks for information about the recipient Developer account.
You need two values:
- the Apple Account of the recipient account's Account Holder;
- the recipient Apple Developer account's Team ID.
Enter the Account Holder's Apple Account in the first field. It is important to use the account owner's information, not the Apple Account of a regular App Store Connect user with the Developer, App Manager, or Admin role.
Enter the Team ID in the second field.
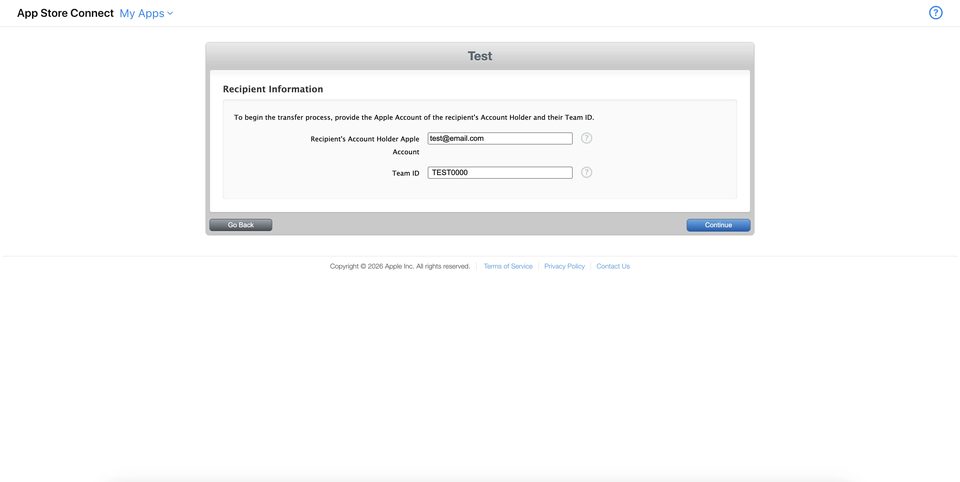
The Team ID is the unique identifier for an Apple Developer Program membership. The recipient can find it after signing in at developer.apple.com/account under Membership details.
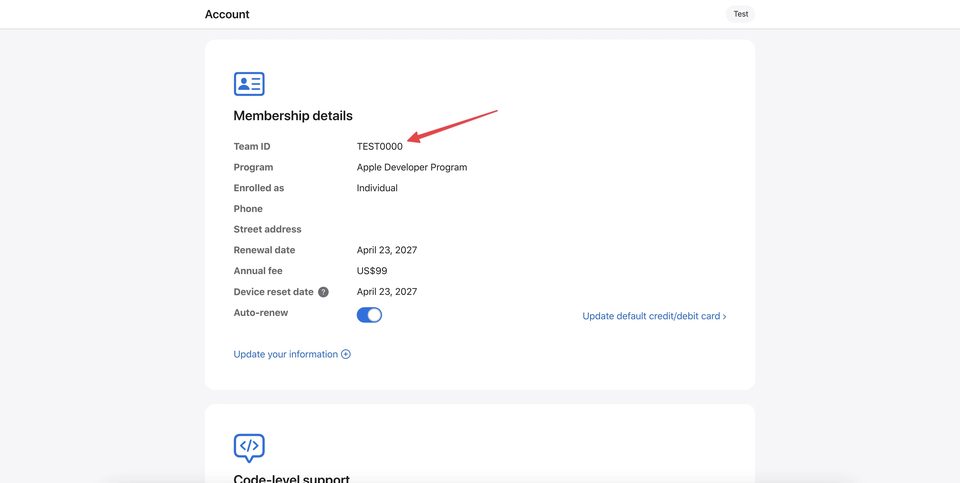
Before continuing, verify both the Apple Account and the Team ID again. A mistake here may require cancelling the request and starting the transfer again.
Step 6. Accept the Transfer Terms
After the recipient information is verified, Apple displays the Application Transfer Agreement, which governs the transfer of the app between Developer accounts.
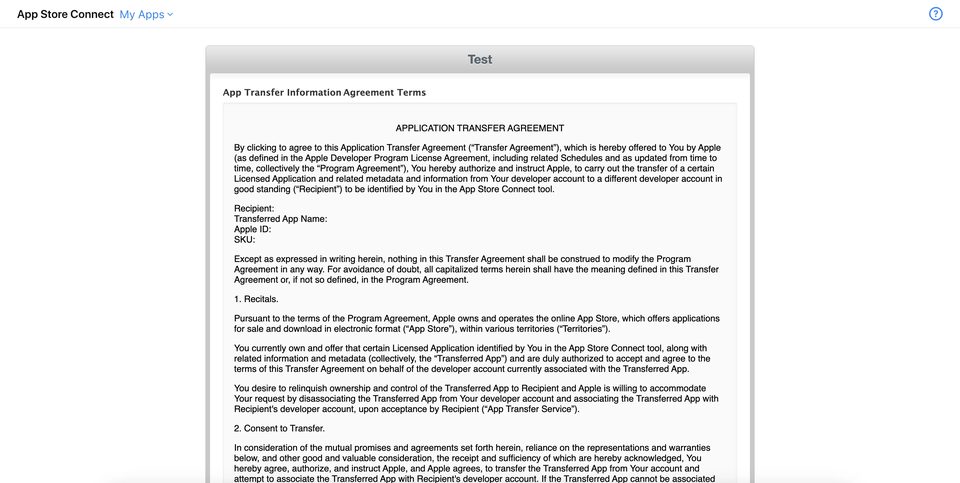
At the bottom of the page, select the checkbox confirming that you agree to the terms and click Request Transfer.
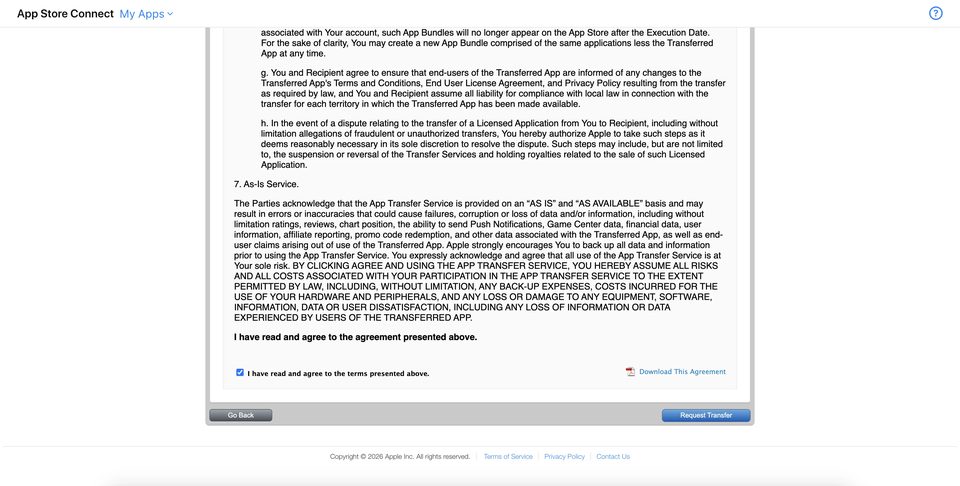
After the request is submitted, the app receives a transfer-pending status. Until the recipient accepts the app, it remains on the sender's account, although some settings become unavailable for editing.
A notification appears on the app page confirming that the transfer request has been submitted.
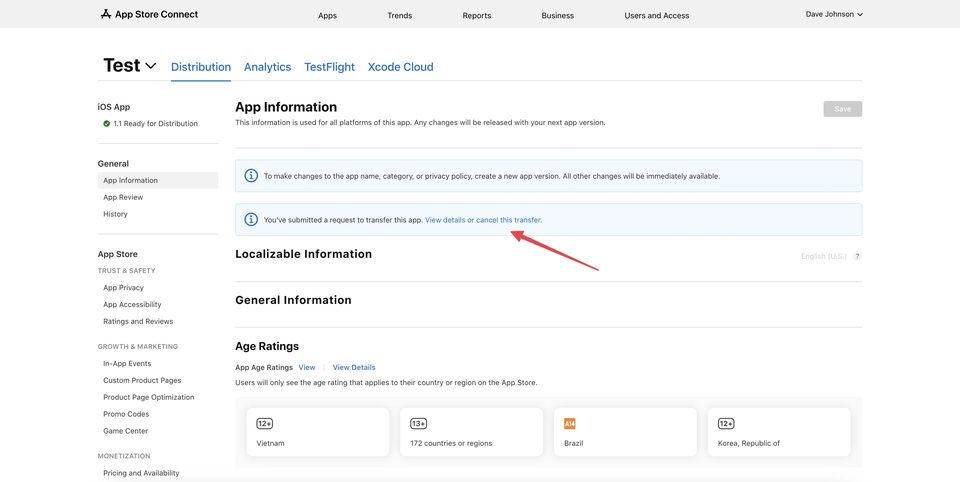
At this point, the sender's actions in App Store Connect are temporarily complete.
Step 7. The Recipient Opens the App Transfer
Now switch to the recipient Apple Developer account.
The recipient's Account Holder signs in to App Store Connect and opens Business. The app appears in the App Transfers section with the status Waiting for Recipient.
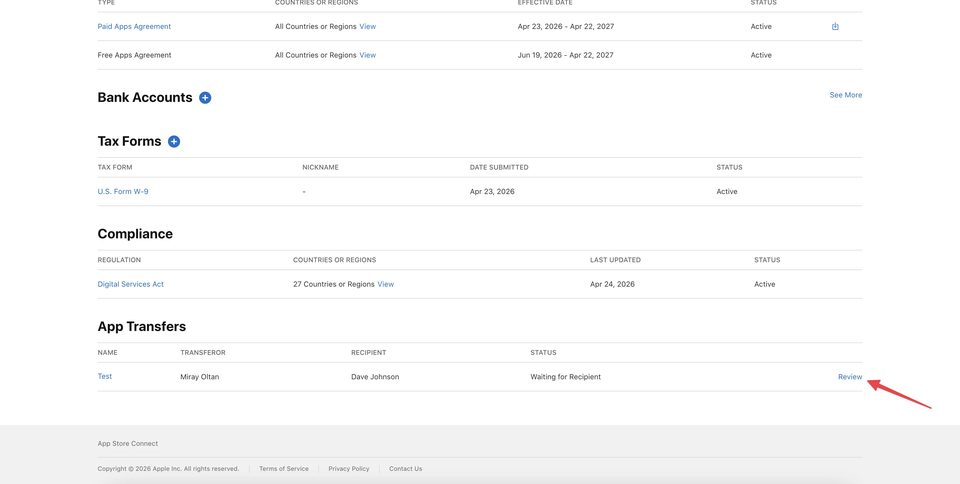
Click Review to open the request.
Apple gives the recipient up to 60 days to accept the transfer. If the request is not accepted within that period, it expires.
Step 8. Complete the Recipient-Side Information
The recipient account must provide new information for the app. Depending on the app's current configuration, App Store Connect may ask for:
- Support URL;
- Marketing URL, if the app previously used one;
- Privacy Policy URL, if one was previously provided;
- App Review Contact Information;
- App Store contact information;
- User Access settings;
- a decision about the existing App Privacy responses.
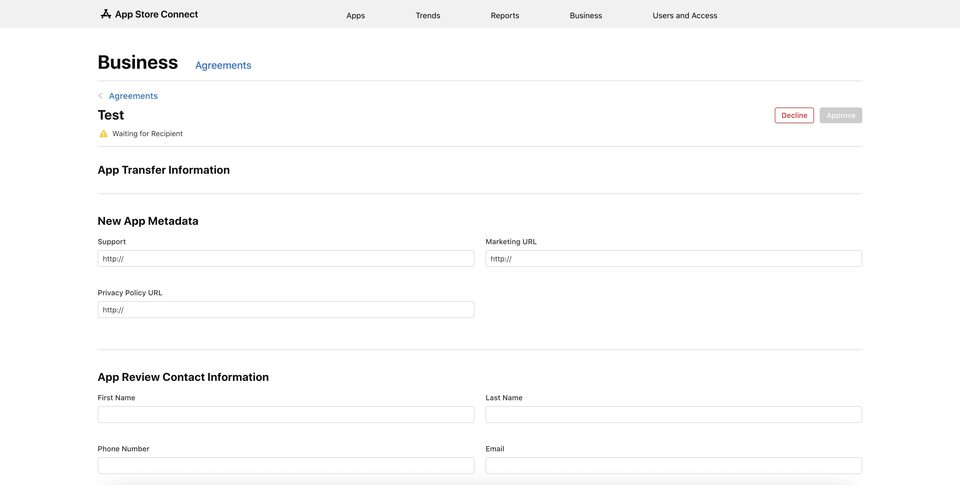
Some of these URLs can be copied from the sender account in advance.
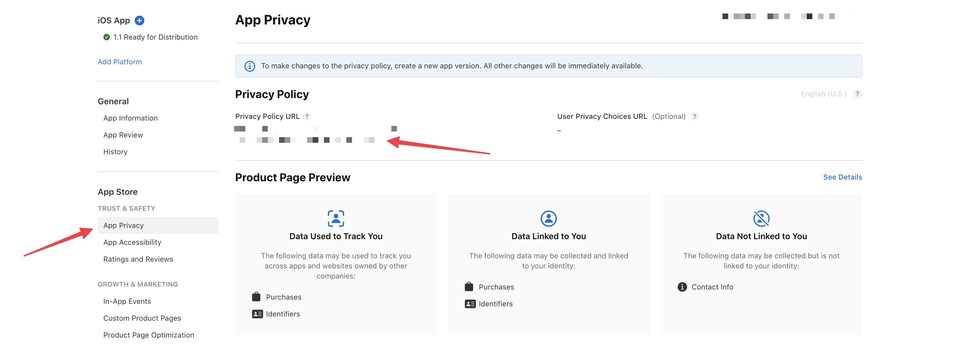
The Privacy Policy URL can be found in App Privacy.
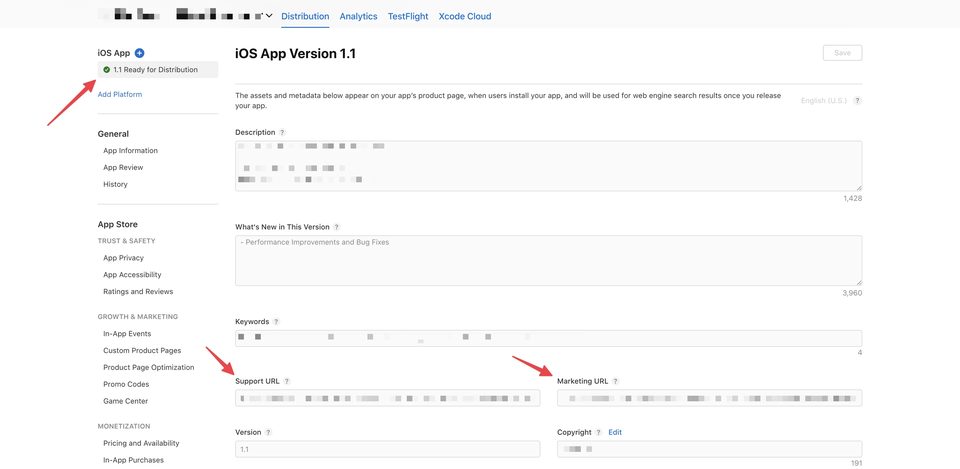
The Support URL and Marketing URL can be found in the metadata for the latest published app version.
It is better to save this information before submitting the transfer. Apple recommends that the sender keep a copy of the app information because the app will be removed from the sender's App Store Connect after the transfer is completed.
Step 9. Review App Privacy and Accept the App
The recipient should carefully review the App Privacy section.
If the previous owner already disclosed what data the app collects and how it is used, the recipient can keep the existing responses or clear them and answer the questions again. If the responses are cleared, or if no responses were previously provided, App Privacy must be completed before the next app version can be submitted.
After completing the remaining fields, scroll down to Terms and Conditions, accept the agreement, and confirm receipt of the app.
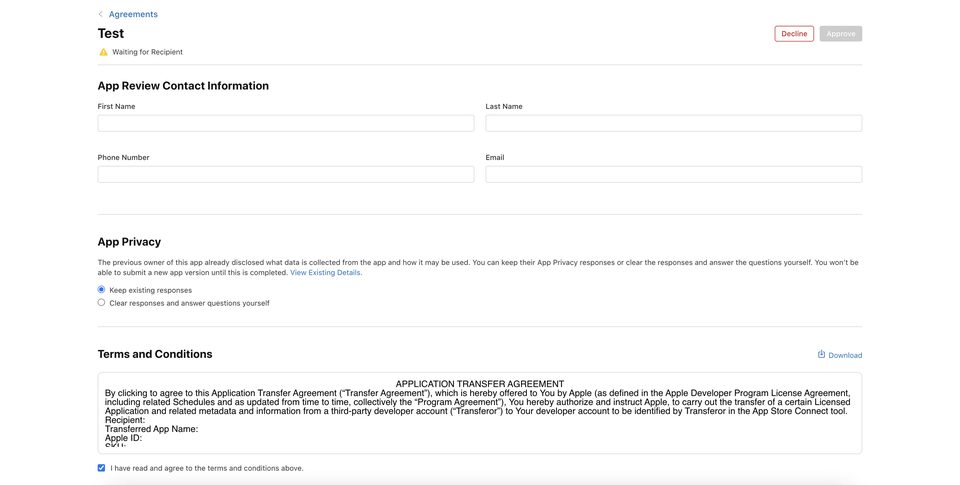
After confirmation, App Transfer processing begins. For a simple app, the transfer may complete fairly quickly, but Apple officially notes that the process can take up to two business days. During this time, the app may show the status Processing App Transfer.
Once the process is complete, both Account Holders receive a notification, the app disappears from the sender's App Store Connect, and it appears under the new owner's account.
What Is Preserved After the App Transfer
App Transfer does not create a brand-new app listing. Key parts of the existing app remain in place:
- the app remains available for download on the App Store;
- ratings and reviews are preserved;
- users continue to receive new versions;
- the Bundle ID remains the same;
- the App ID is transferred to the recipient's Developer account.
The project's source code is not transferred automatically through App Store Connect. The sender and recipient must separately transfer the repository, backend infrastructure, keys, and other working materials.
After the transfer, the recipient also needs to create new provisioning profiles associated with the transferred App ID and its certificates.
What Requires Extra Attention for More Complex Apps
If the app uses only basic iOS capabilities, the transfer is usually relatively straightforward. Projects that rely on additional Apple services may require substantially more preparation.
Pay particular attention to:
Auto-renewable subscriptions. The app-specific shared secret must be transferred correctly, and the backend should be prepared for the ownership change.
Sign in with Apple. User identifiers need to be migrated, and depending on the configuration, additional Service ID steps may be required.
Push Notifications. After the transfer, make sure the recipient team can continue signing and sending push notifications.
Keychain Sharing. After the app is updated under the new account, the keychain group may need to change, and users may need to sign in again in some configurations.
iCloud and CloudKit. Understand in advance which containers the app uses and how the transfer will affect related projects.
Xcode Cloud. Related Xcode Cloud data must be removed before the transfer.
For this reason, App Transfer should be treated not only as an App Store Connect action, but also as a technical migration of the project between two development teams.
What Happens to Sales and Analytics
After the transfer is completed, financial data is split based on when the transfer occurred.
The sender retains access to sales and payout information from before the transfer but cannot see new financial data generated afterward. The recipient, in turn, receives sales and payout data for the period after the transfer is completed.
The sender also loses access to the app's App Analytics after the transfer. It is therefore useful to save any needed history, reports, metadata, and other information before starting the process.
Conclusion
A published app can be moved to another Apple Developer account using Apple's official App Transfer process in App Store Connect. The key is not to start the transfer before the app and both accounts are properly prepared.
First, review Agreements on both accounts, the app's current state, and all criteria shown on the Transfer App page. Then prepare the recipient Account Holder's Apple Account and Team ID, save the app metadata and URLs, and only then submit the transfer request.
On the recipient side, open the transfer in Business, provide the required contact information and URLs, review App Privacy, accept the agreement, and approve the transfer.
For simple apps, these steps are usually enough. If the project uses subscriptions, Sign in with Apple, iCloud, push notifications, Wallet, Game Center, Xcode Cloud, or other Apple services, review the requirements for those capabilities in advance. This helps the App Transfer complete without unexpected issues and allows the app to continue operating for users under the new Apple Developer account.
Individual $350 · Company $650 · Renewal $200. Message us and we'll help you choose the right option.
Message on Telegram