
Codemagic is a convenient way to build and send iOS apps to App Store Connect through CI/CD without having to perform the entire process manually in Xcode on your primary work device every time. This approach is especially useful if you want to automate publishing, simplify repeated builds, and reduce manual steps.
Another advantage of this setup is a cleaner workflow for working with an Apple Developer account. If your goal is to keep work environments separated and avoid unnecessary links between accounts, signing an Apple Developer account directly into Xcode is highly undesirable. Instead, the build and upload process can be moved into a separate CI/CD workflow through Codemagic.
In this article, we will go through the complete process: from preparing the Xcode project to seeing a new build in App Store Connect. For the example, we use a standard iOS project, a GitHub repository, and a Personal Codemagic account. For this type of workflow, Codemagic's free plan is usually sufficient.
If you prefer watching the process step by step instead of reading, open our YouTube video. It shows the entire workflow on a real example and follows the same logic as this article: https://www.youtube.com/watch?v=lbAM75jt6Sk.
What You Need Before You Start
Before configuring Codemagic, prepare the following:
- an Xcode project that already runs without errors;
- a GitHub repository where you can push the project;
- an app that has already been created in App Store Connect;
- an Apple Developer account with permission to create an App Store Connect API key;
- an email address you will use to register your Codemagic account.
Make sure the Bundle Identifier in the project matches the Bundle ID of the app in App Store Connect. Otherwise, automatic publishing will not work correctly.
Preparing the Xcode Project
Start with the project itself. Before uploading, make sure the app is fully prepared, runs correctly on a simulator or real device, and does not contain critical errors that could appear once the CI/CD build starts.
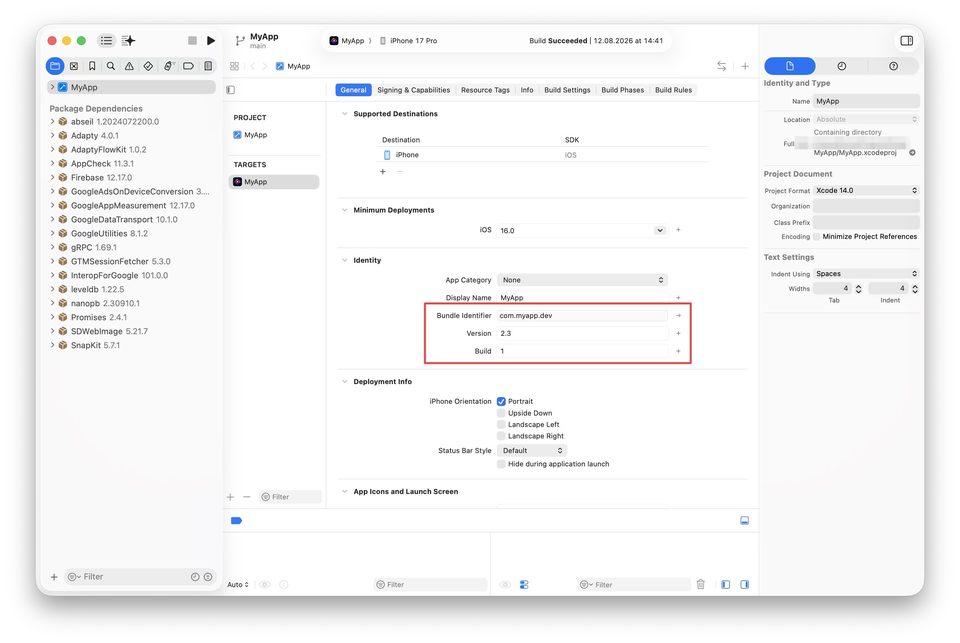
Before you begin, also check three key parameters: Bundle Identifier, Version, and Build. The Bundle Identifier must match the target app in App Store Connect, while the Version and Build values must be higher than those of the latest build already uploaded to the account.
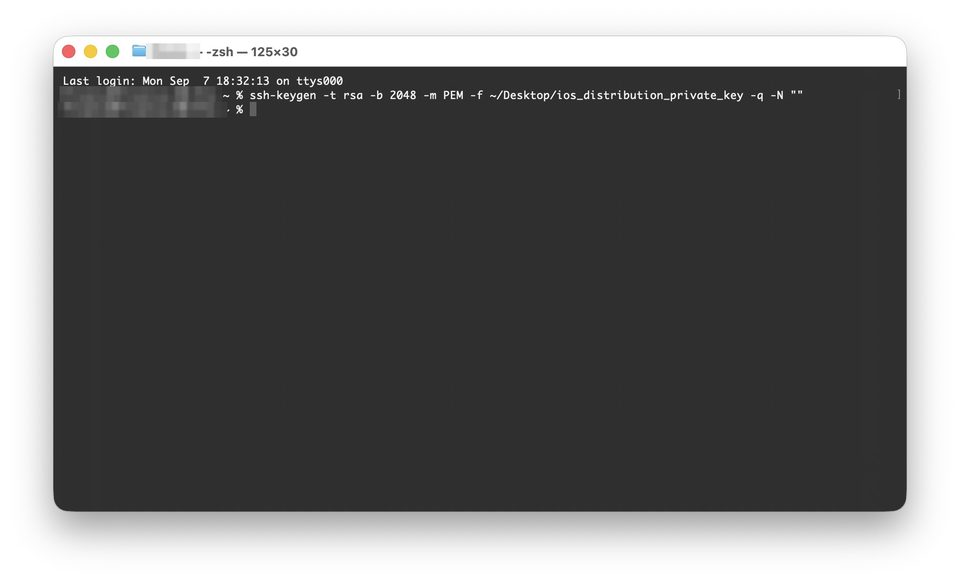
Next, prepare an SSH key that will be used later in the configuration. Open Terminal and generate a new RSA key with the following command:
ssh-keygen -t rsa -b 2048 -m PEM -f ~/Desktop/ios_distribution_private_key -q -N ""
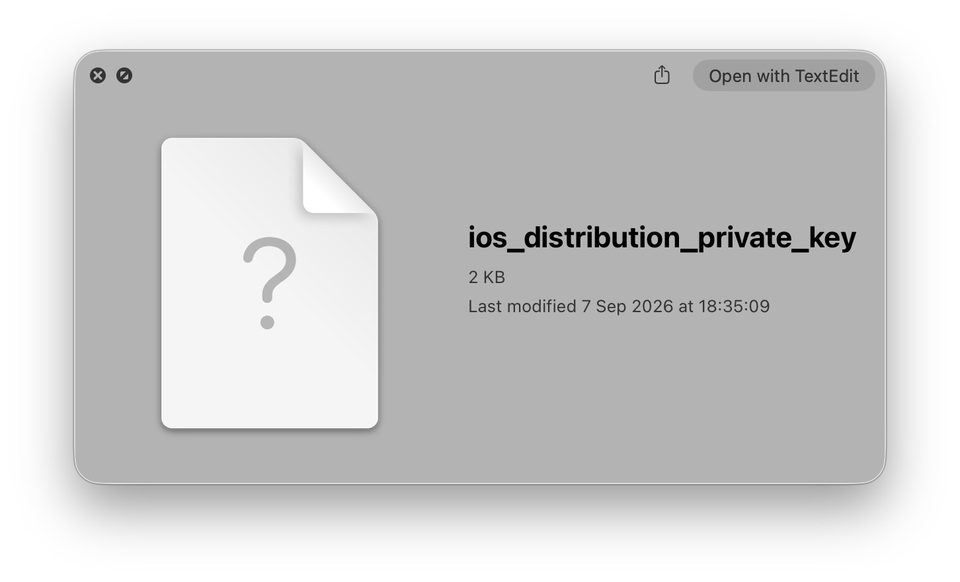
After the command runs, a file named ios_distribution_private_key will appear on the desktop. Its contents will be needed later for the Codemagic configuration. It is best to keep this file until the setup is complete.
Return to the project. In the project root, create a file named codemagic.yaml. This is the main configuration file that tells Codemagic how to build the app, configure code signing, and where to send the finished build.
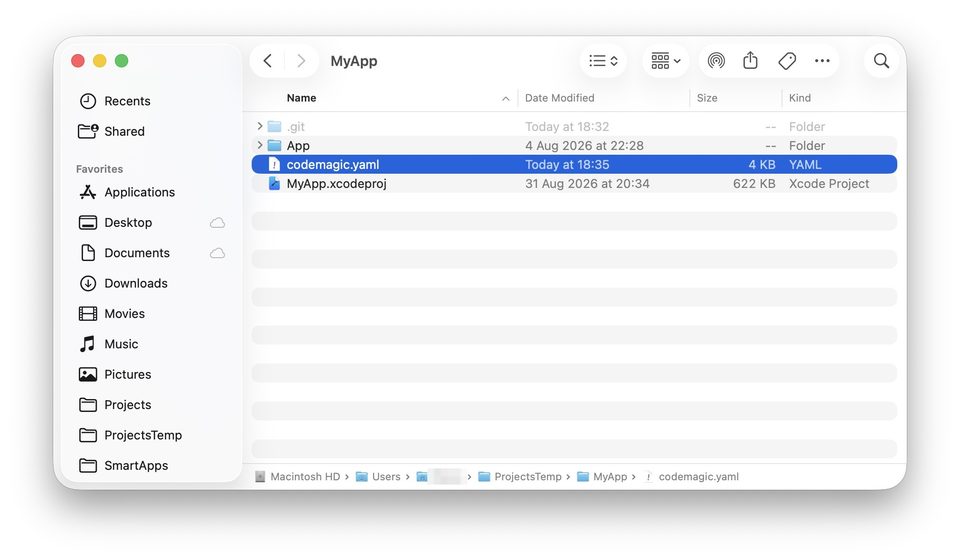
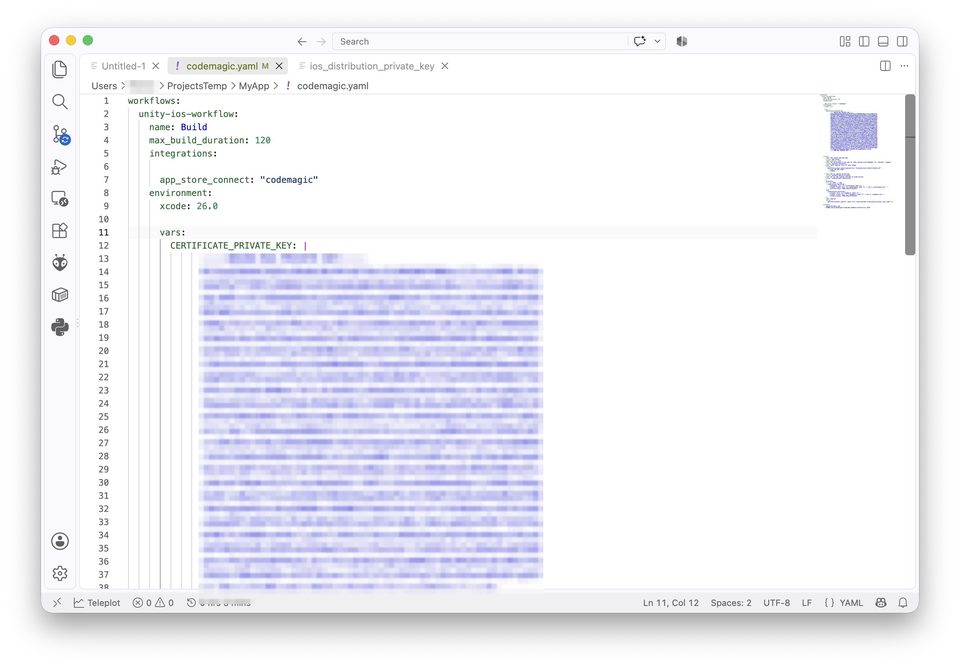
Next, paste your prepared configuration into codemagic.yaml. Pay special attention to the CERTIFICATE_PRIVATE_KEY block. This is where the contents of the RSA key must be inserted.
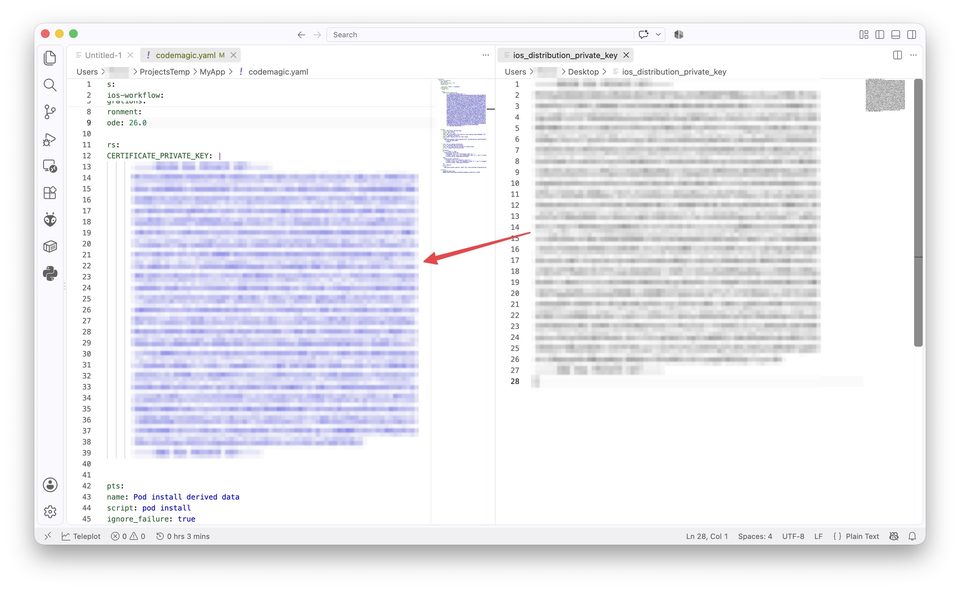
Open the ios_distribution_private_key file, copy all of its contents from BEGIN RSA PRIVATE KEY to END RSA PRIVATE KEY, and paste it into the CERTIFICATE_PRIVATE_KEY block inside codemagic.yaml. Then save the file.
Once the configuration is ready, push the entire project together with codemagic.yaml to GitHub. After that, you can move on to creating a repository access token.
Creating a GitHub Personal Access Token
To allow Codemagic to access a private GitHub repository, you will need a Personal Access Token. It is better to create it in advance before registering and connecting the repository in Codemagic.
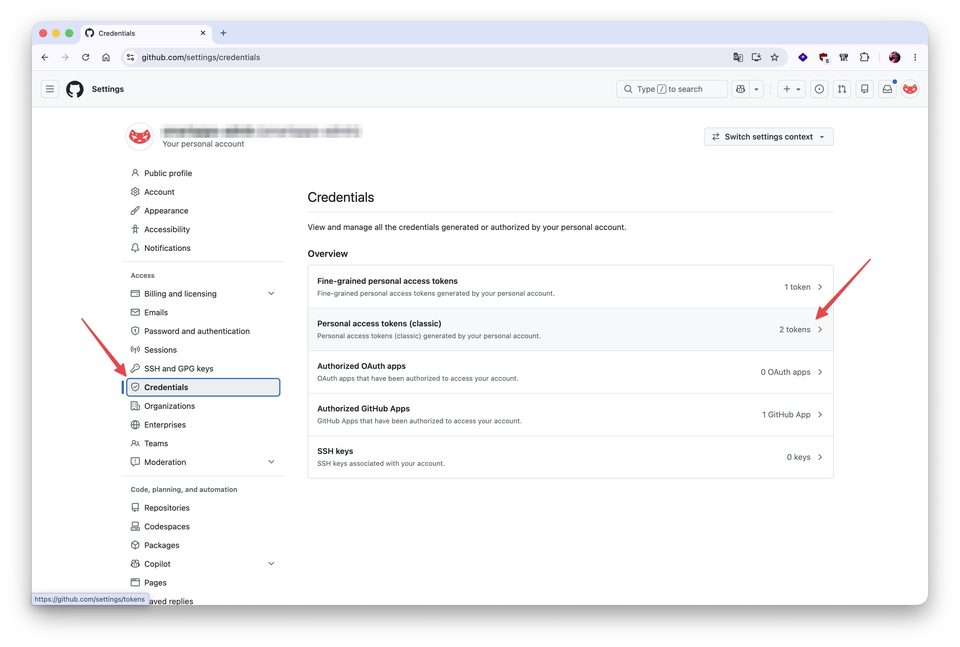
First, open GitHub, click your profile icon, and go to Settings.
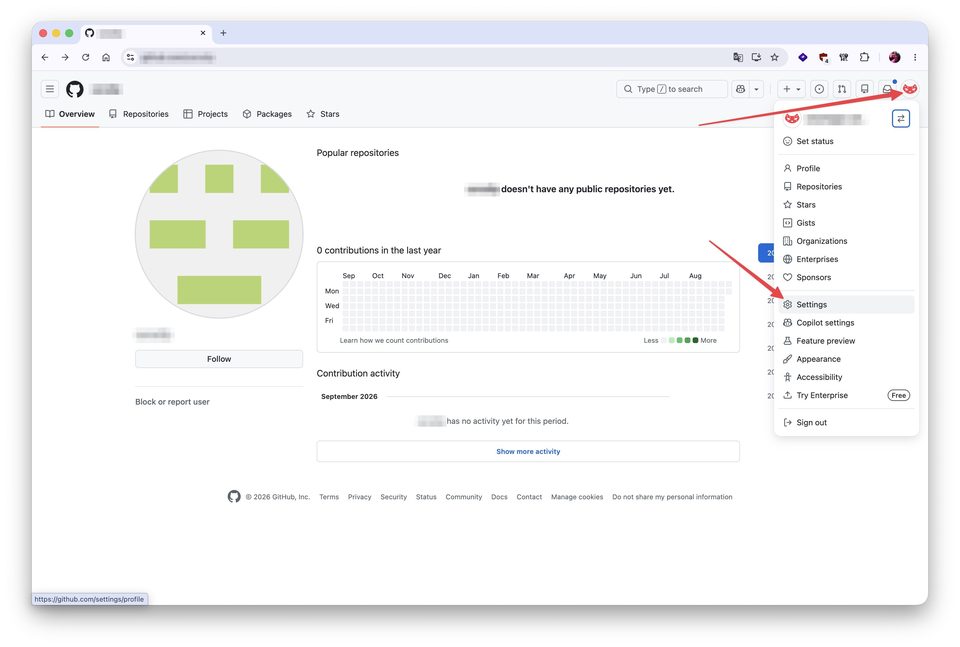
Next, open Credentials, then go to Personal access tokens (classic).
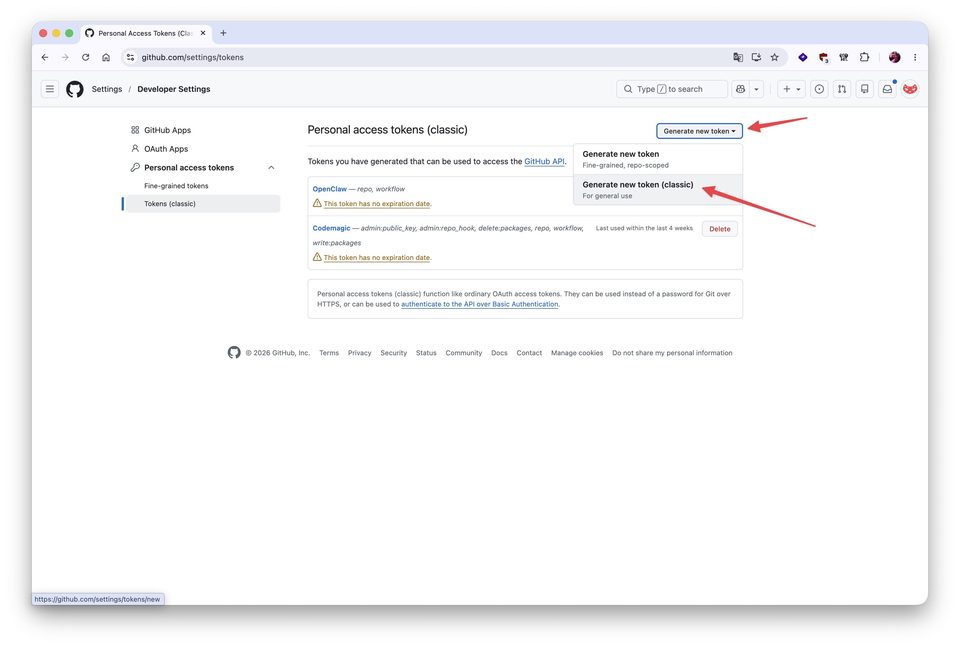
Alternatively, if you are already in the tokens section, click Generate new token and select Generate new token (classic).
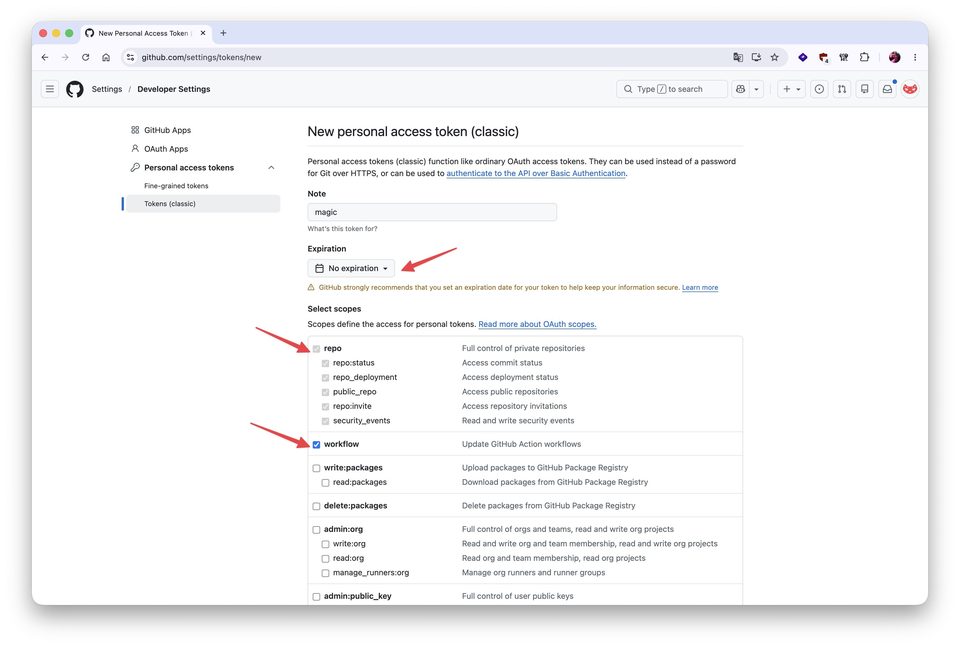
In the new token settings, you can enter codemagic in the Note field. In our example, the token is created without an expiration date. Under permissions, make sure to enable repo and also enable workflow.
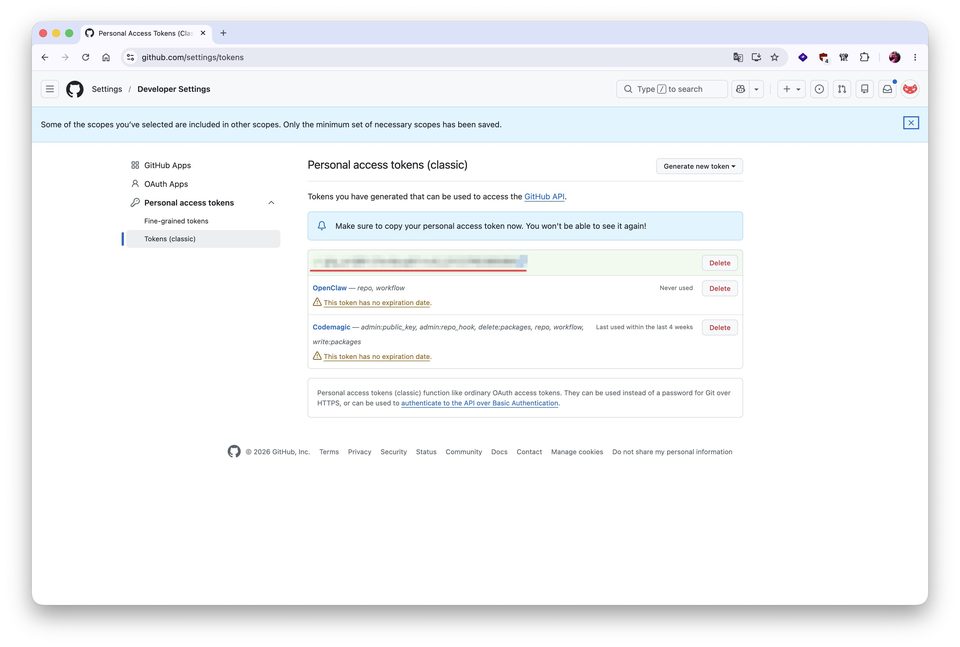
After creation, GitHub will display the token only once. Save it immediately in a secure place. You will need it in the next step when connecting the repository to Codemagic.
Removing Xcode User Data Before Publishing
We already mentioned that you should avoid signing an Apple Developer account into your working Xcode environment and that you do not need to select a Team for the app during development. However, before moving on to the build and publishing process, there is one more step: remove local Xcode user data from Git and add it to the ignore rules.
Even if an Apple Developer account has never been used inside Xcode, the project may still contain xcuserdata directories with local user data. To prevent these files from being pushed to GitHub, remove them from tracked files and add the relevant paths to .gitignore. This way, you will not need to repeat this step before every future build.
First, open the project root in Finder. Right-click the project file with the .xcodeproj extension and select New Terminal at Folder.
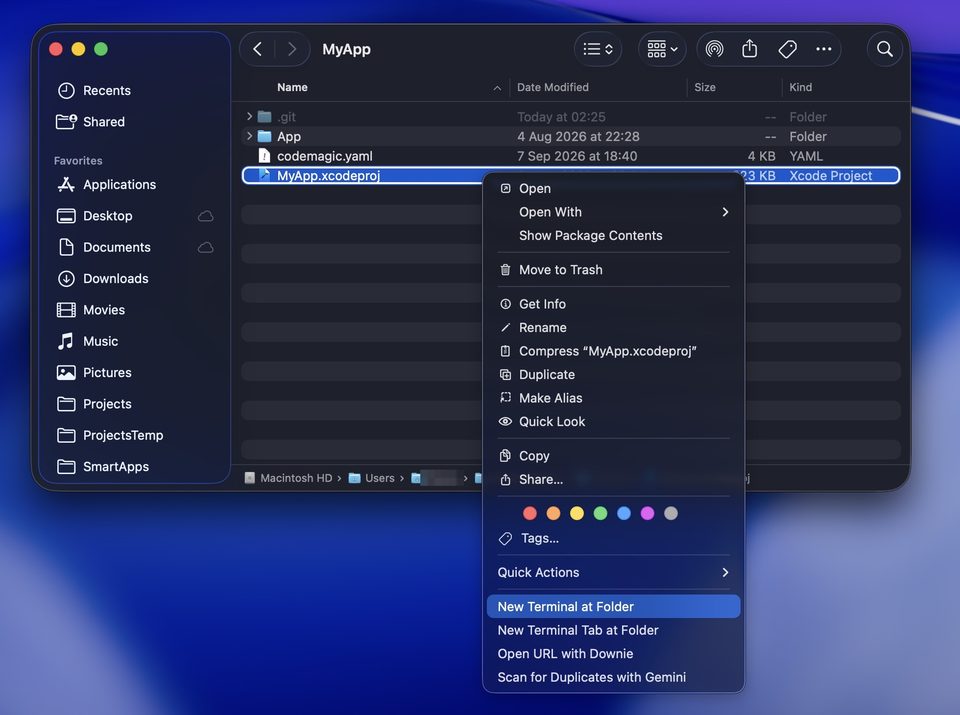
In the Terminal window, remove the Xcode user directories from the Git index:
git rm -r --cached xcuserdata
git rm -r --cached project.xcworkspace/xcuserdata
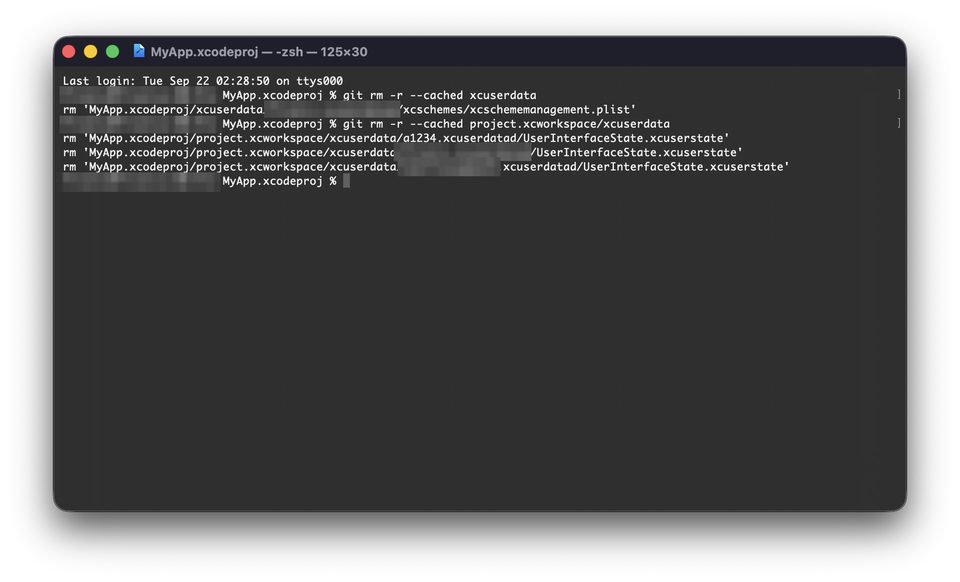
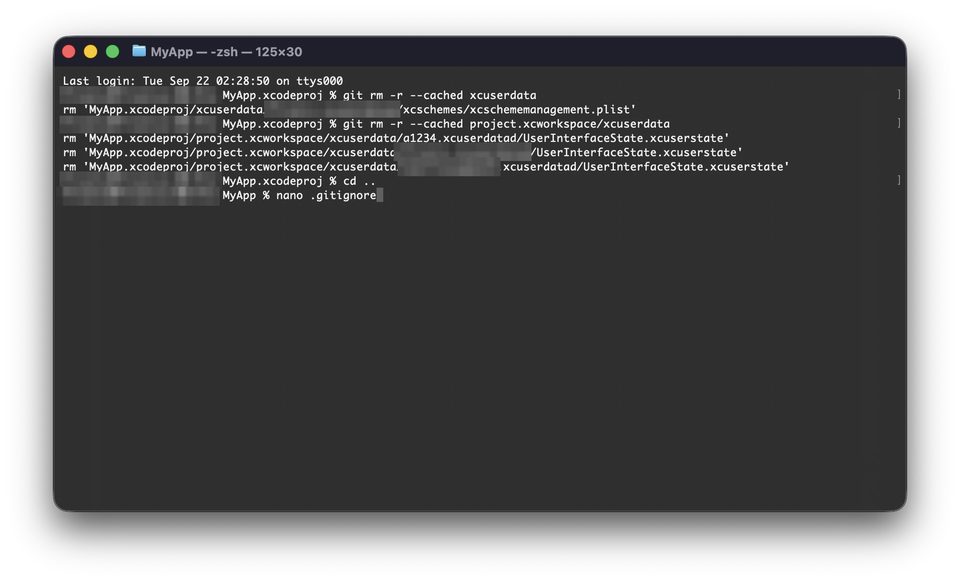
Then return to the project root level. If the .gitignore file does not exist yet, create it through Terminal:
cd ..
nano .gitignore
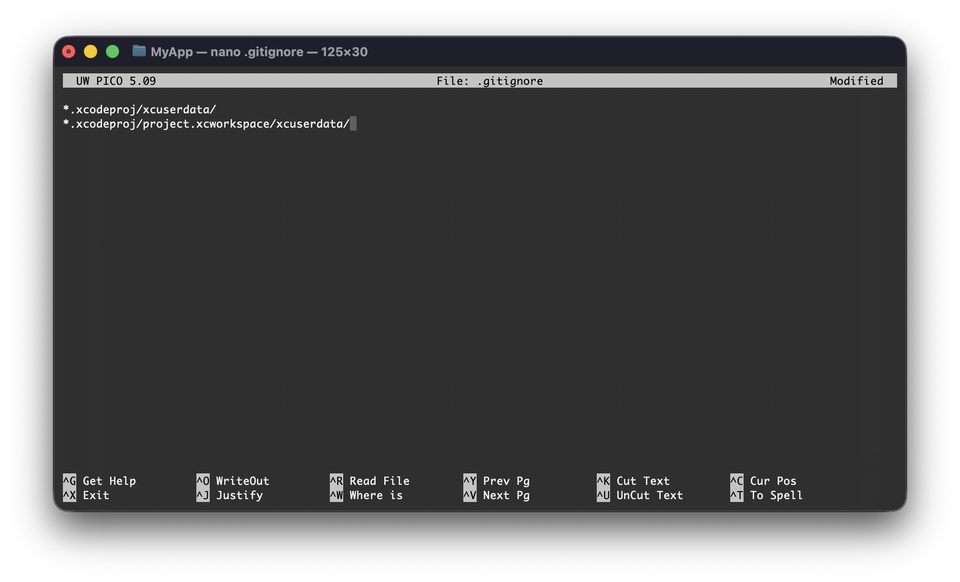
Add the following lines to .gitignore:
*.xcodeproj/xcuserdata/
*.xcodeproj/project.xcworkspace/xcuserdata/
If .gitignore already exists, you do not need to create a new file — simply add these exclusions to it. When using nano, save the changes with Control + X, then press Y and Enter.
Now commit the changes to Git and push them to the repository:
git add .
git commit -m "remove user data"
git push
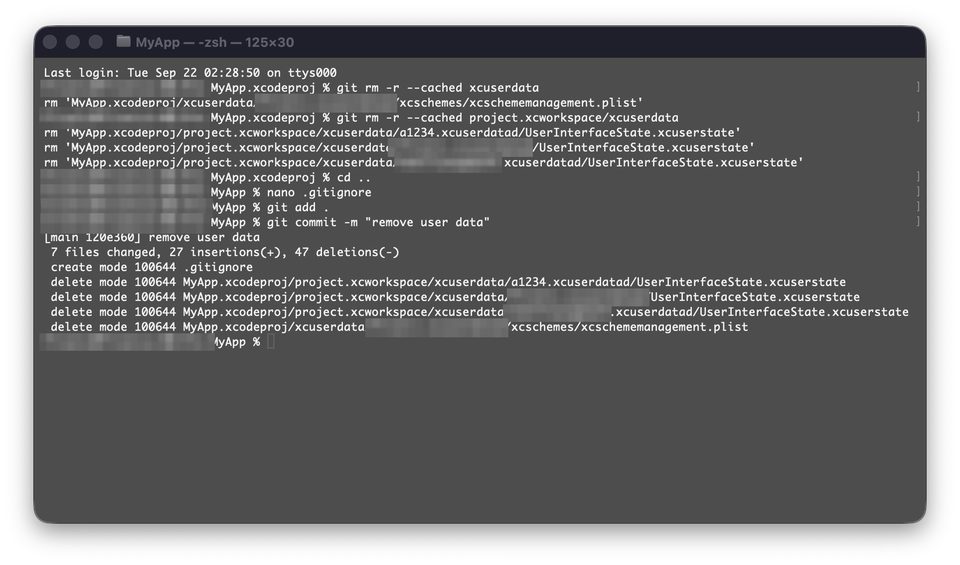
After this, xcuserdata and the files inside project.xcworkspace/xcuserdata should no longer be included in future commits. You can continue using the project to configure Codemagic and build through CI/CD.
Creating an App Store Connect API Key
Now move on to the Apple side of the setup. At this stage, the app should already exist in App Store Connect, and its Bundle ID should match the one used in the Xcode project.
Open App Store Connect and go to Users and Access. Then open the Integrations tab and select App Store Connect API from the left menu.
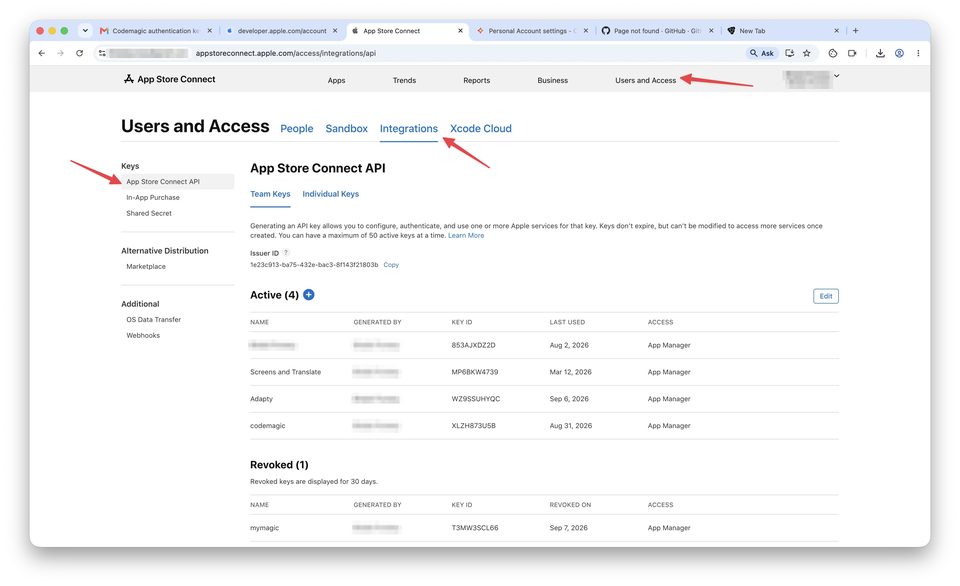
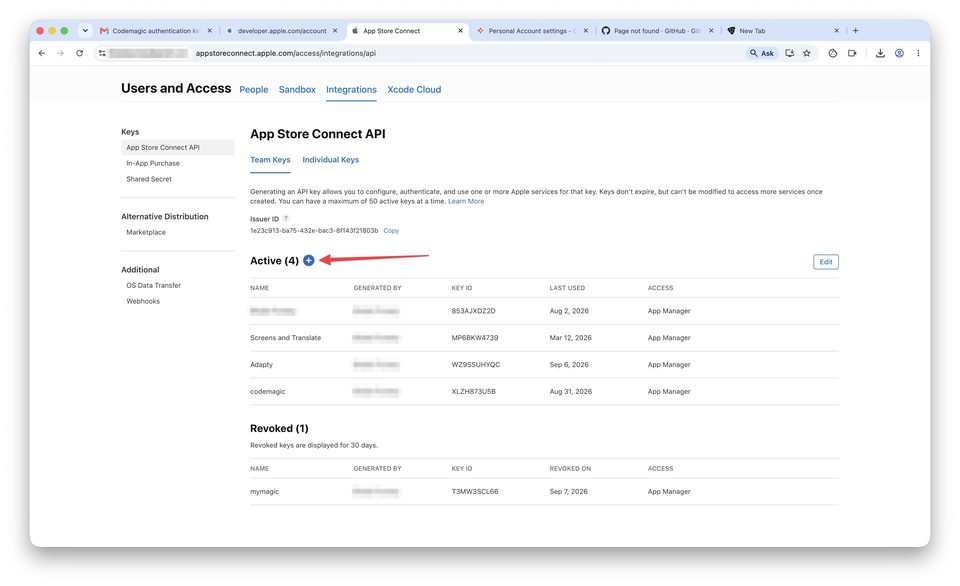
If there is no active key for this task yet, click the plus button and create a new API key.
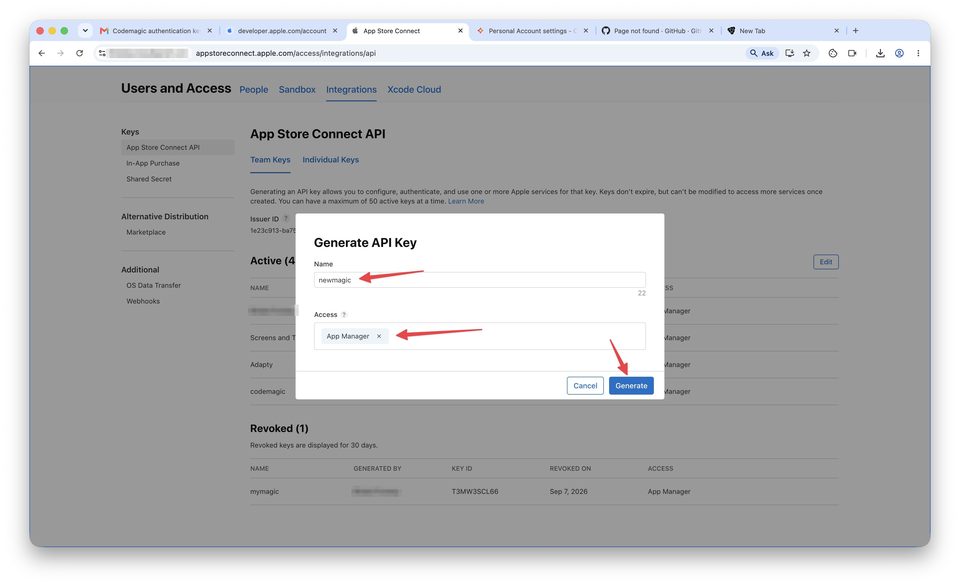
If this is the first API key in the account, Apple may additionally ask you to confirm access to the API. This is normal. In the key creation window, enter a name such as codemagic and choose the appropriate access level. For a typical build upload workflow, use a level of access sufficient for working with the app and its builds.
After creating the key, save three things:
Issuer ID;Key ID;- the downloaded
.p8file.
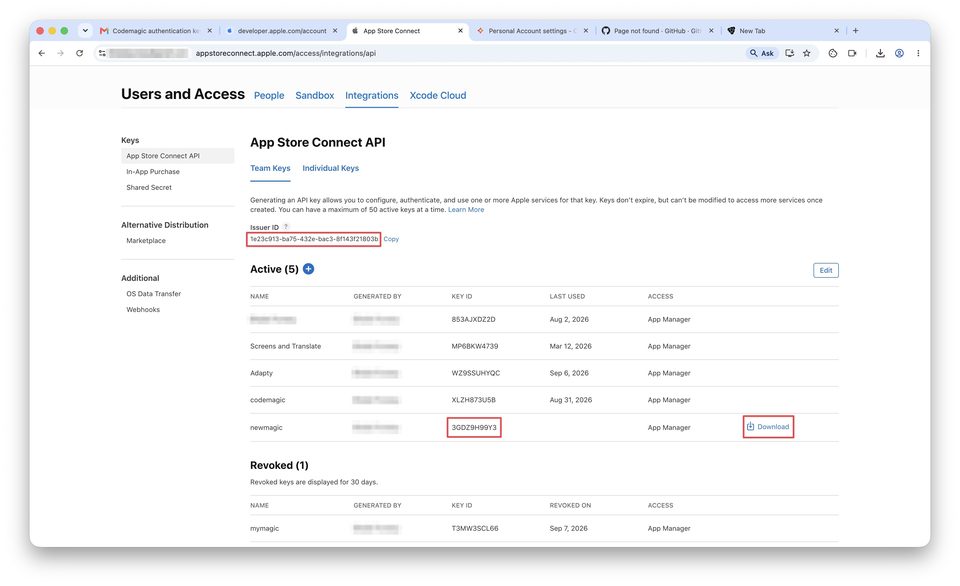
There is one important detail: the .p8 file can only be downloaded once. If you do not save it, you will need to create a new key later. It is best to store it immediately in a separate secure folder.
Registering in Codemagic and Connecting the GitHub Repository
Once the GitHub token and App Store Connect API key are ready, you can move on to Codemagic.
Open the Codemagic website and start registration by clicking Sign up.
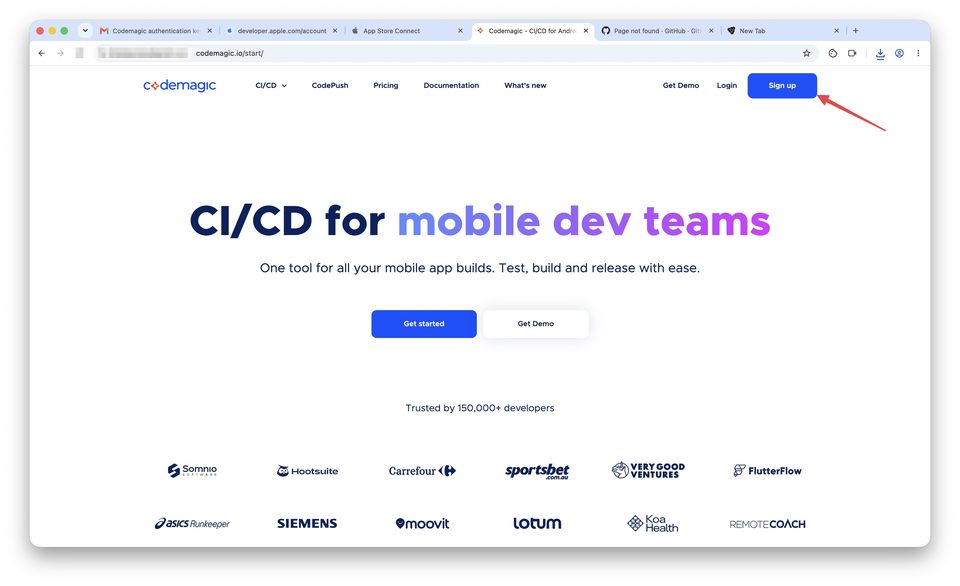
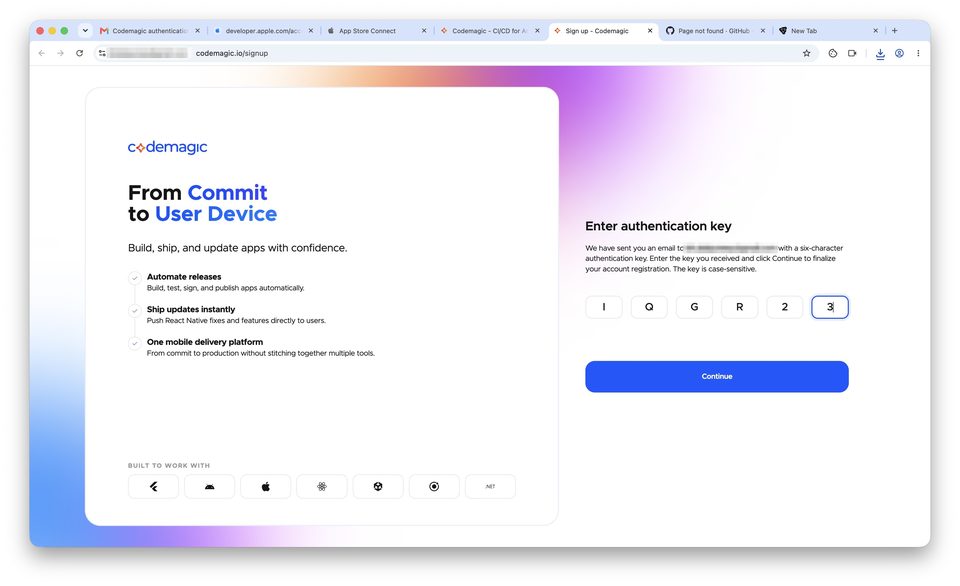
Enter your email address, confirm the registration, and enter the code sent to your email.
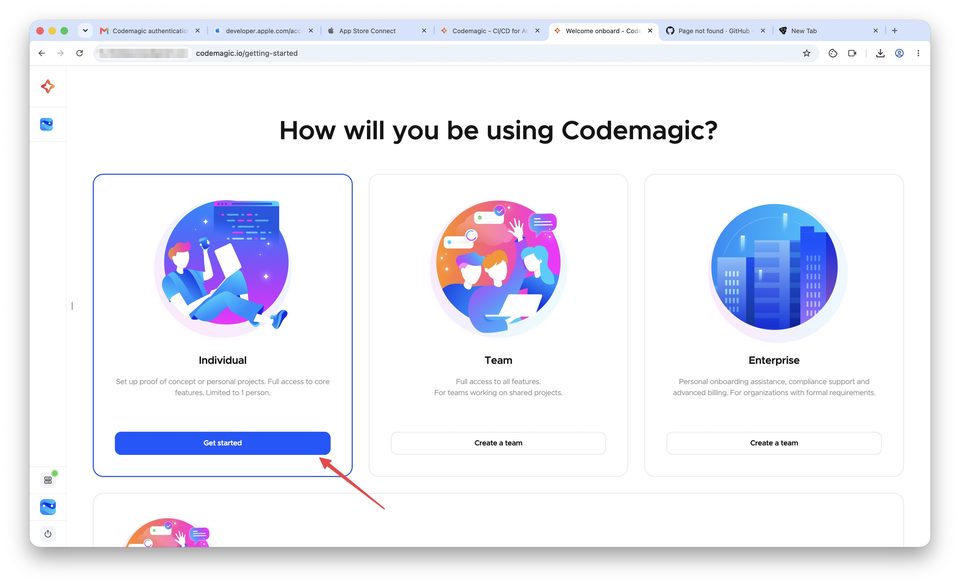
After confirmation, Codemagic will ask how you plan to use the service. For our example, select Individual.
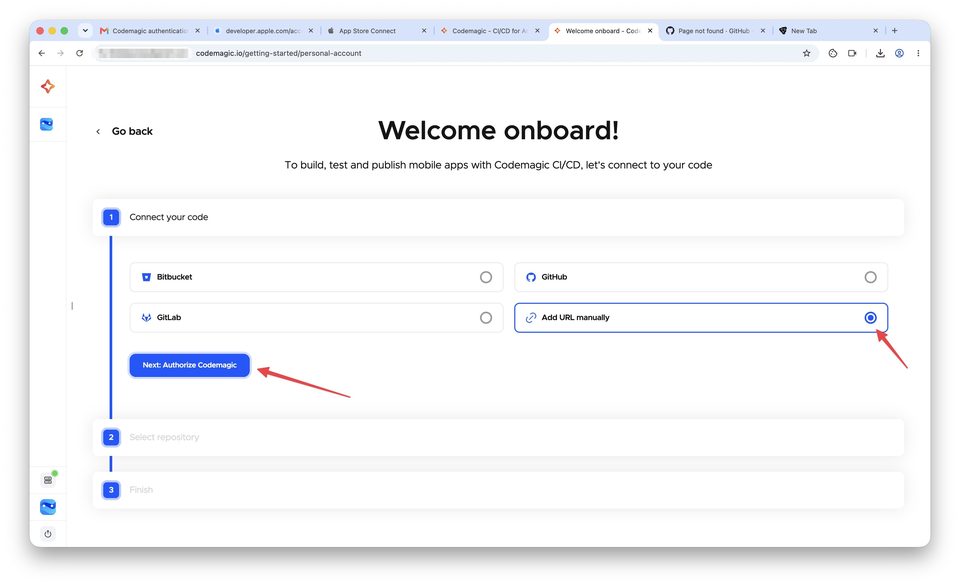
The initial setup will then start. At the Connect your code step, choose the option to connect the repository manually through Add URL manually.
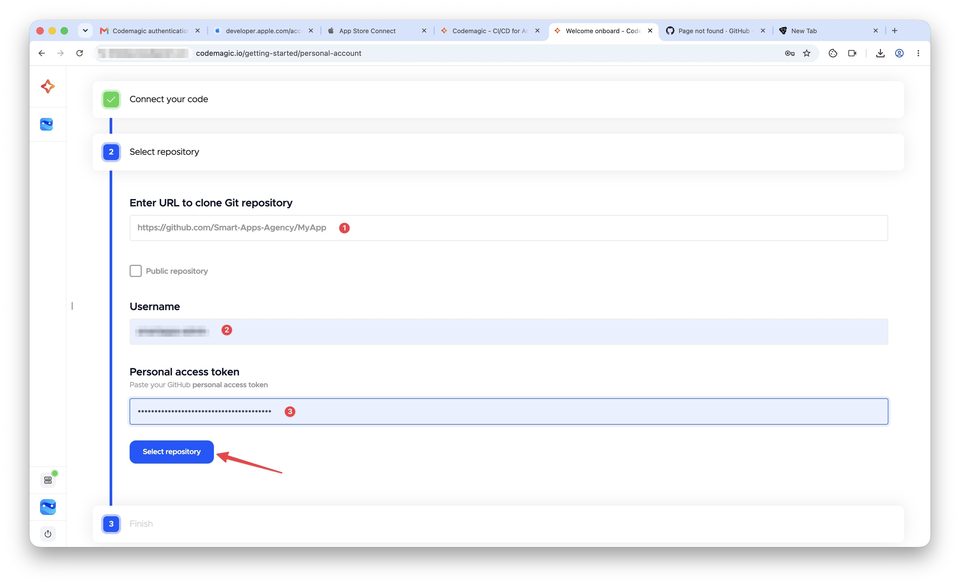
Next, enter the GitHub repository URL, then provide the GitHub account username and paste the saved Personal Access Token. If the repository is private, do not select Public repository. Then confirm the repository selection.
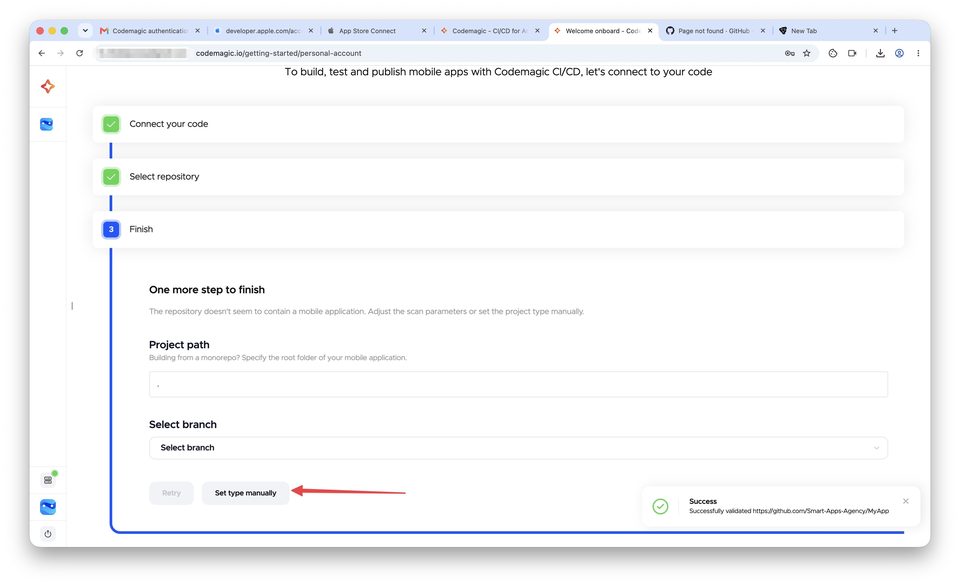
Sometimes Codemagic does not detect the project type automatically. In that case, click Set type manually.
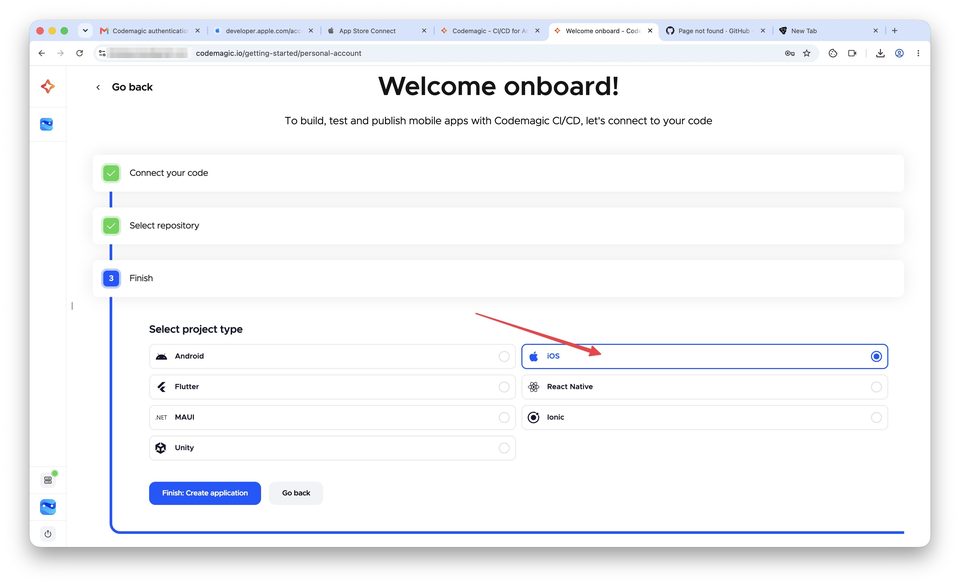
Then select iOS as the project type manually and finish creating the application.
After the initial onboarding is complete, the app will appear in the Codemagic application list. If necessary, open it through Applications and complete the remaining setup steps.
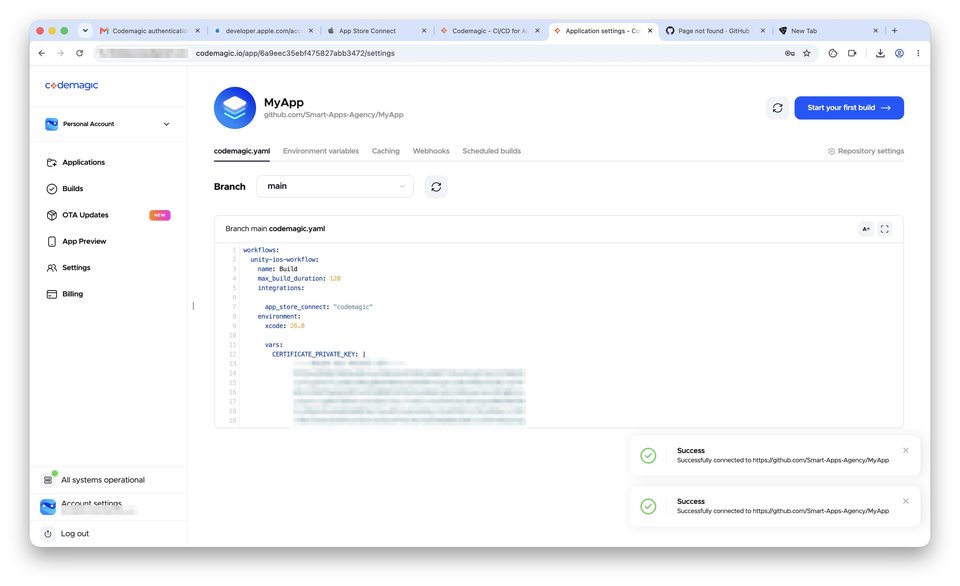
When everything is configured correctly, Codemagic will pull the repository and detect the codemagic.yaml file. The configuration should then be visible inside the project, and the repository connection should complete without errors.
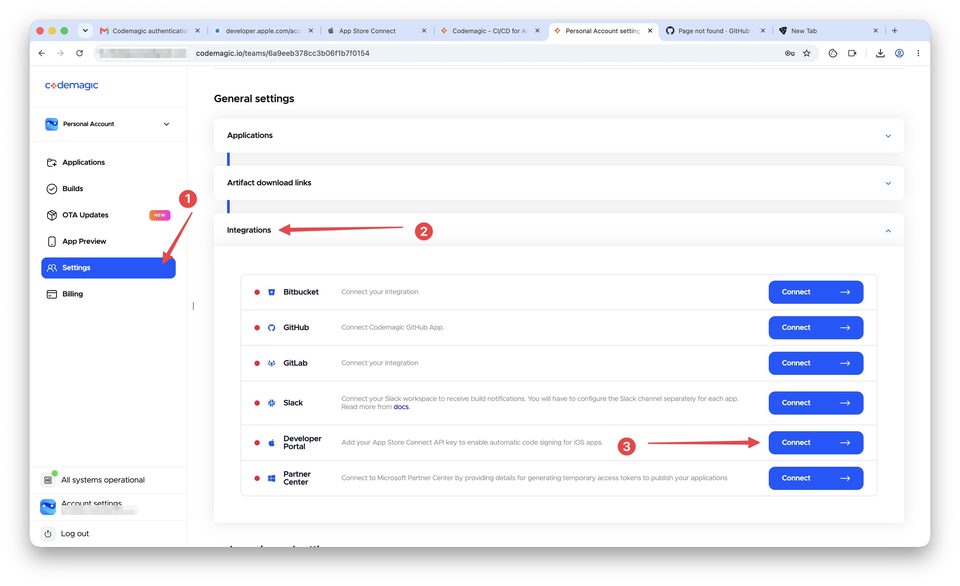
Connecting the Apple Developer Account to Codemagic
The next step is to give Codemagic access to the Apple Developer account through the App Store Connect API key.
In Codemagic, open Settings, expand the Integrations section, find Developer Portal, and click Connect.
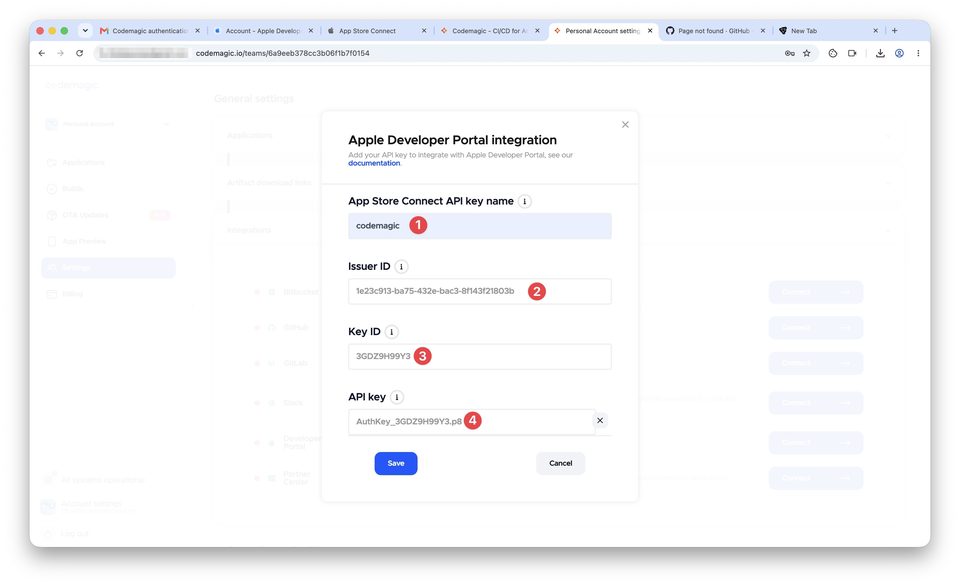
In the connection form, enter the key name, for example codemagic. Then paste the saved Issuer ID, add the Key ID, and upload the downloaded .p8 file in the API key field.
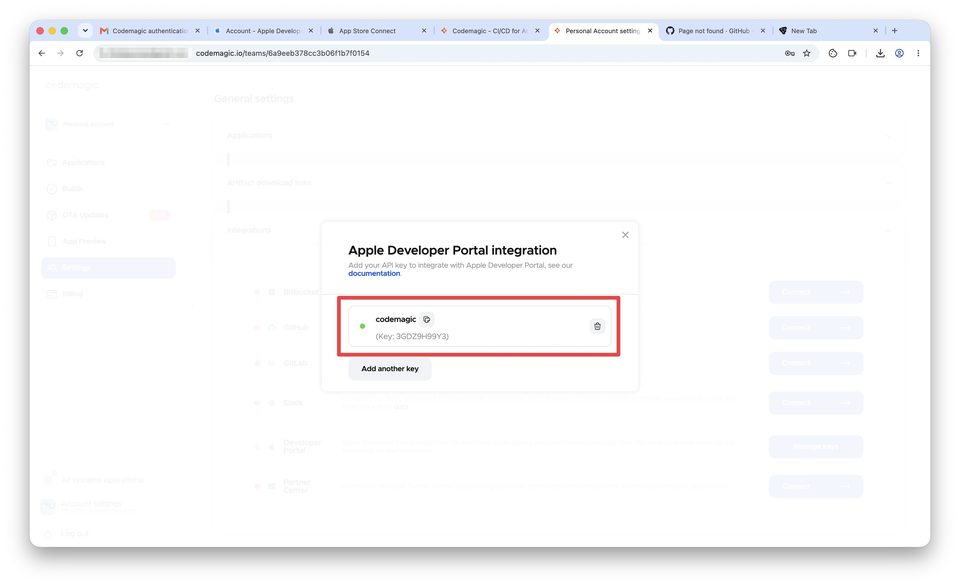
After saving, check that the key appears in the connected keys list and is shown as active. This means the Apple Developer Portal integration has been configured correctly.
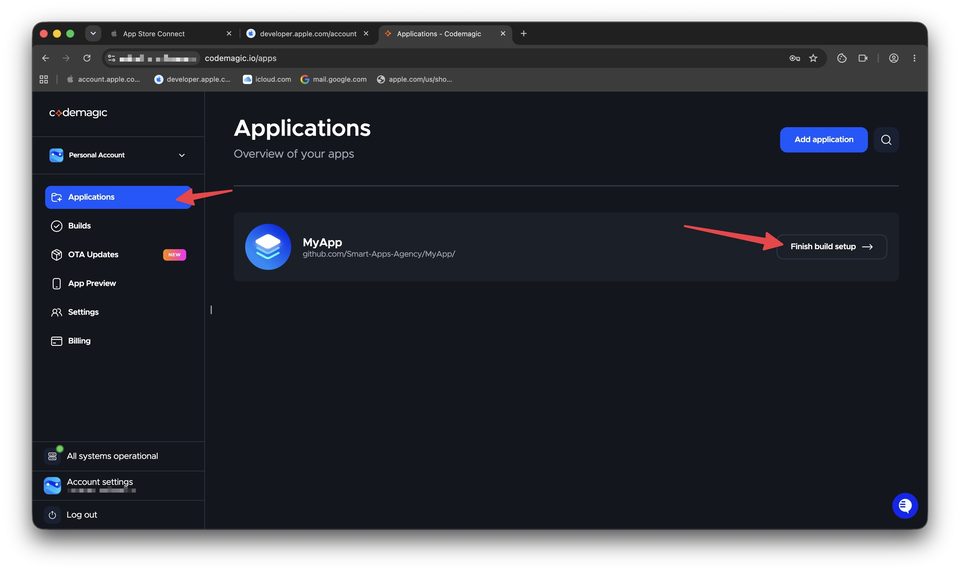
At this point, Codemagic has access both to the GitHub repository and to the connected Apple Developer account. You can now move on to the build itself.
Starting a Build in Codemagic
Open the required app in Codemagic. If the repository and configuration have already been imported successfully, the project will show a Start your first build or Start new build button.
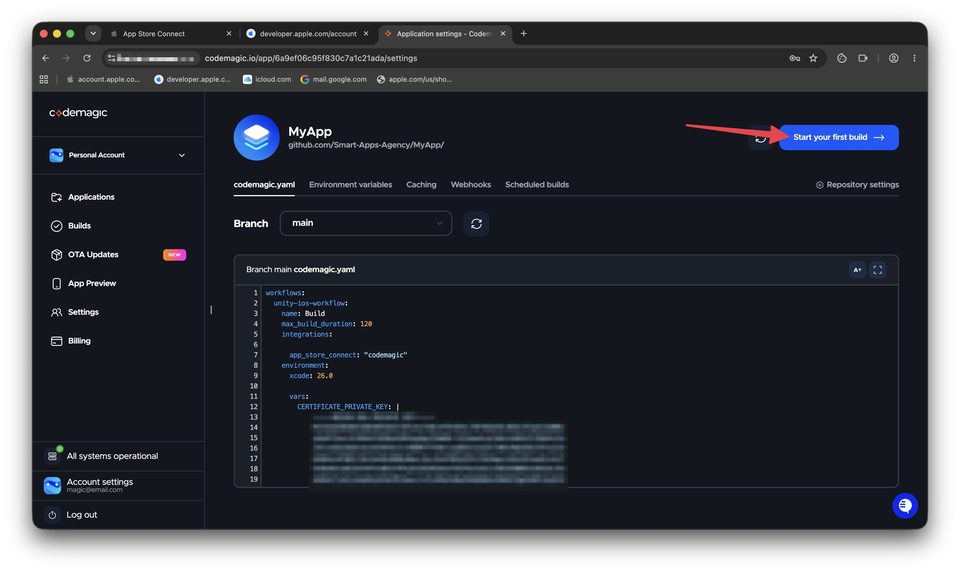
Click the build button and review the parameters. Usually, you need to select the required branch, such as main, and the workflow from the codemagic.yaml file. In our example, the workflow is called Build.
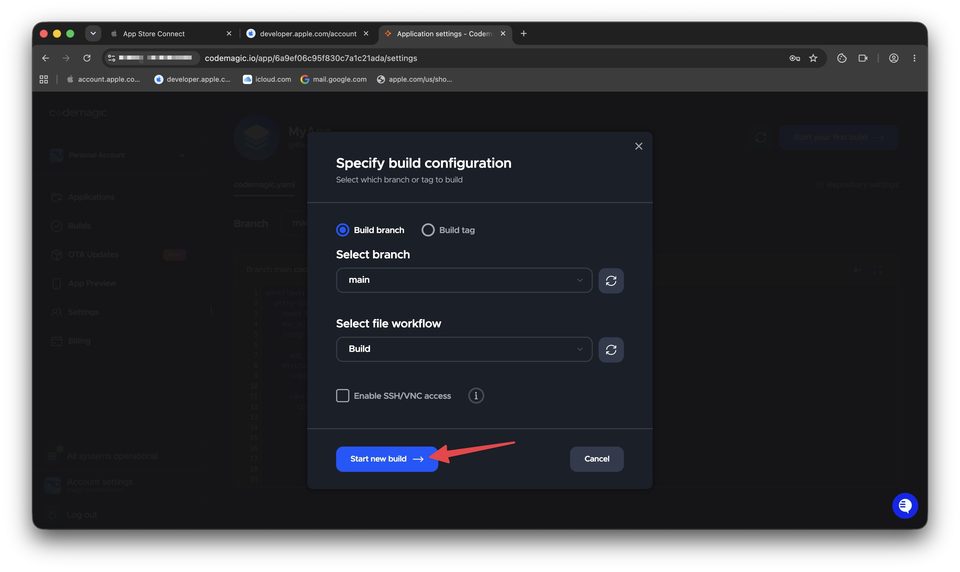
After confirmation, the build starts automatically. Codemagic first prepares the build machine, then downloads the sources from GitHub, configures the environment, retrieves the required signing files, applies code signing, and builds the final IPA file.
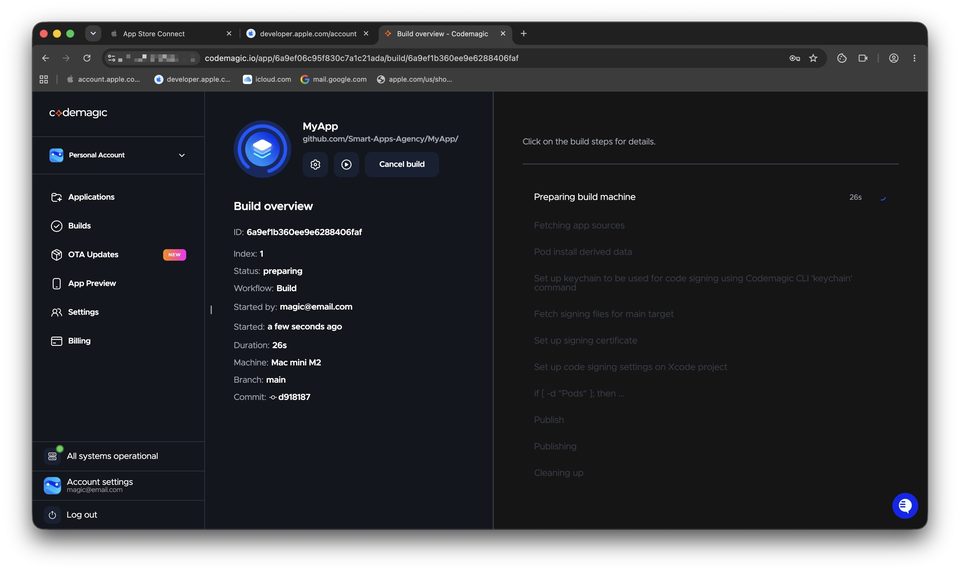
When the workflow completes without errors, a green success indicator appears next to the app, and the logs show that all stages finished correctly.
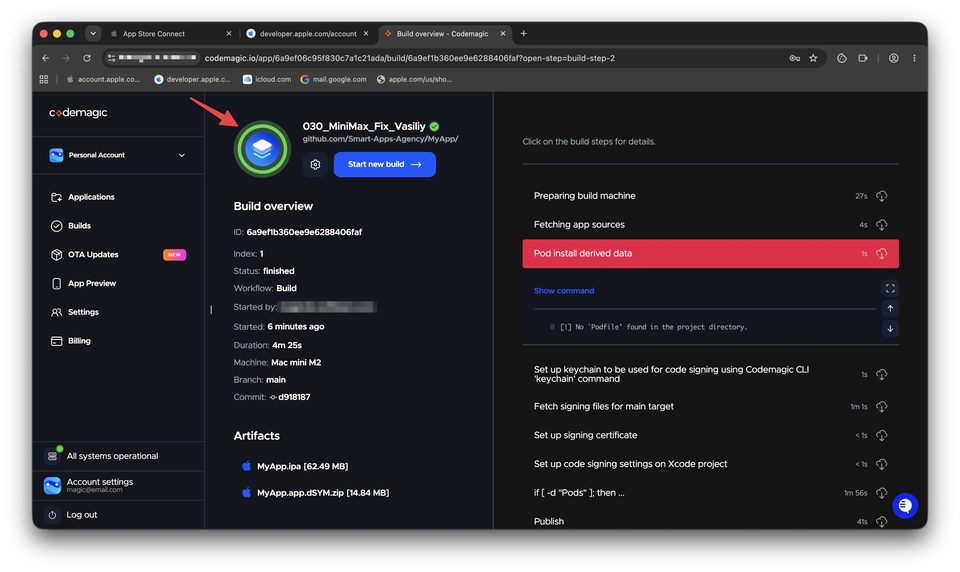
At this stage, Codemagic automatically handles the main part of the process: it clones the project, uses the connected Apple Developer account, retrieves the necessary signing files, builds the IPA, and sends the build to App Store Connect.
Checking the Build in App Store Connect
After a successful build, open App Store Connect and check the required app. After some time, the new build will appear in the builds list and can be used for the next steps, such as TestFlight or a new App Store release.
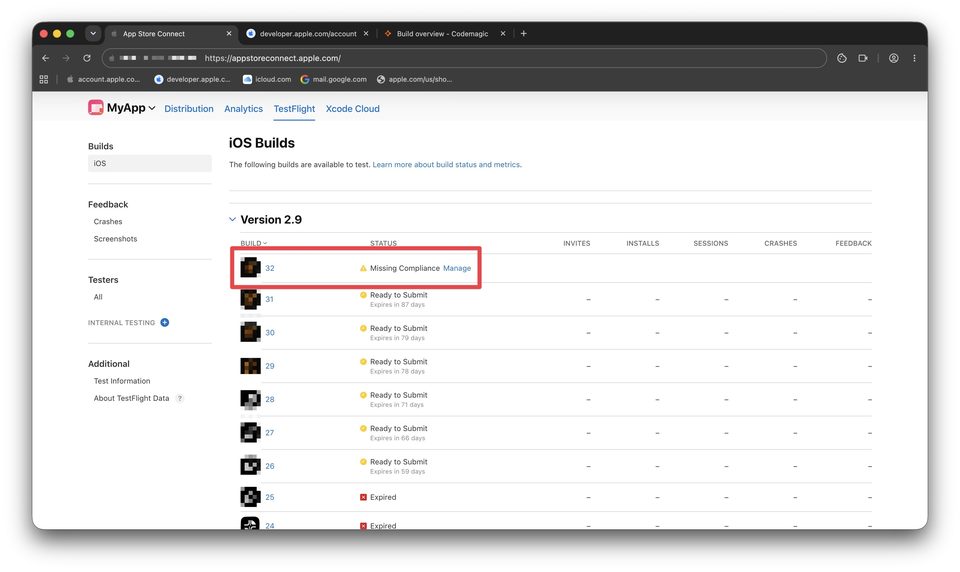
If you see a status such as Missing Compliance next to the new build, this does not mean Codemagic failed. It usually means Apple requires additional export compliance information. In that case, open Manage and complete the standard form. After that, the build can be used normally.
What to Do for Future Builds
After the initial setup, the whole process becomes much simpler. You do not need to create new keys, reconnect GitHub, or configure Codemagic from scratch again.
For the next upload, it is usually enough to:
- update
VersionorBuildin the Xcode project; - make code changes if necessary;
- push the updated project to GitHub;
- open Codemagic again and start a new build.
If the GitHub + Codemagic + App Store Connect API key setup is already working, future builds can be sent to App Store Connect much faster and more conveniently than rebuilding manually each time.
Conclusion
We have now gone through the complete process of uploading an iOS app to App Store Connect through Codemagic.
First, we prepared the Xcode project: checked the Bundle Identifier, Version, and Build, generated an RSA key, and added it to codemagic.yaml. Then we created a GitHub Personal Access Token and an App Store Connect API key. After that, we registered in Codemagic, connected the repository, added the Apple Developer account integration, and started an automated build.
At first glance, there are quite a few steps, but most of this setup only needs to be done once. After that, Codemagic becomes a convenient tool for quickly building and uploading new versions of an iOS app without constant manual work in Xcode.
If you prefer watching instead of reading, return to our video walkthrough: https://www.youtube.com/watch?v=lbAM75jt6Sk. The video shows the complete process on screen, including the App Store Connect, GitHub, and Codemagic interfaces.
If you still have questions about Codemagic, app uploads, App Store Connect, or working with Apple Developer accounts, it is usually best to review the exact case: from the project structure and codemagic.yaml to code signing and build statuses after upload.
Ready accounts with a 7-day guarantee. 10+ GEO options. Pay only after verification.
Order on Telegram